Angular Inputs and Outputs

Or how to get your components to talk to each other
Directional communication
In the following examples I'll be showing a method to get components to communicate between each other when they are in a direct parent - child relationship. We'll be using the @Input and @Output decorators for this communication pattern.
@Input decorators
@Input decorators are used when you want your component to receive outside data from a component higher up in its DOM element hierarchy. Child components receive outside data from their parent components though a property binding that is attached to their element in the template. This property binding then passes data into the component class and then can be manipulated by the child component.
A simple example of @Input decorator usage:
child.component.ts
import { Component, Input } from '@angular/core';

@Component({
    selector: 'app-child',
    standalone: true,
    template: `
    <h2>Child</h2>
    <p>And anything you type I will reverse: <span style="color: green">{{myInput.split("").reverse().join("")}}</span></p>
    `
})
export class ChildComponent {
    @Input() myInput: string = "";
}
parent.component.ts
import { Component } from '@angular/core';
import { ChildComponent } from '../child/child.component';
import { FormsModule } from '@angular/forms';

@Component({
    selector: 'app-parent',
    standalone: true,
    imports: [ChildComponent, FormsModule],
    template: `
        <h2>Parent</h2>
        <div id="parent-input-container">
            <label for="Parent Input" name="parent-input" >Type Anything: </label>
            <input type="text" [(ngModel)]="inputText">
        </div>
        <div id="child-container">
            <app-child [myInput]="inputText"></app-child>
        </div>
    `
})
export class ParentComponent {
    inputText: string = "";
}
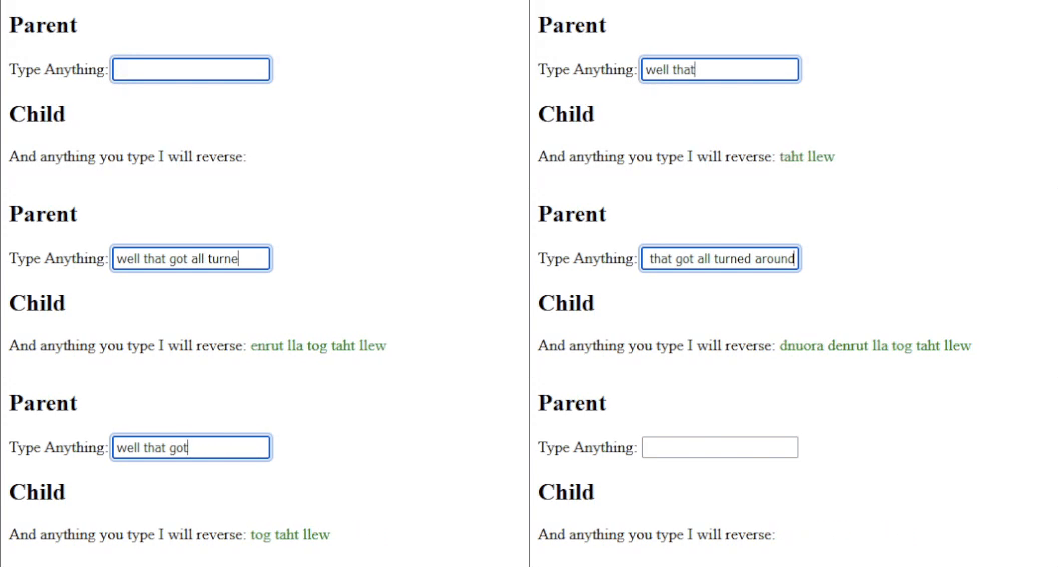
As we can see in the Parent Component, the child selector, app-child, is added to the template and within that selector we property bind the parent value, "inputText" to the "myInput" property in the Child Component. In the ChildComponent class, the "myInput" property is decorated with the @Input() decorator which allows us to dynamically receive input to the property from the parent component. And just for fun, in the child template, we use a little javascript method chaining magic to reverse the input received.
This is what it looks like in action:

@Output decorators
Just as the @Input decorators are a way for a parent element to communicate with a child element, @Output decorators allow child elements to communicate with their parents. They do this with help from an additional helper, the EventEmitter class. Using the EventEmitter class a child component can "emit" data on an event triggered by the template, or, just as part of the component logic. Either way, once emitted, the parent component can respond to the event using a special builtin variable $event.
Survey Component (Parent)
import { Component } from '@angular/core';
import { SurveyChoiceComponent } from "../survey-choice/survey-choice.component";

@Component({
    selector: 'app-survey',
    standalone: true,
    imports: [SurveyChoiceComponent],
    template: `
        <h2>Survey: Favorite Ice Cream Flavor</h2>
        <p>Results:</p>
        <ul>
            <li>Strawberry: {{ strawberry_votes }}</li>
            <li>Vanilla: {{ vanilla_votes }}</li>
            <li>Durian: {{ durian_votes }}</li>
        </ul>

        <app-survey-choice (myOutput)="vote_counter($event)"></app-survey-choice>
    `,

})
export class SurveyComponent {
    strawberry_votes: number = 0;
    vanilla_votes: number = 0;
    durian_votes: number = 0;

    vote_counter(vote:string) {
      if (vote === "strawberry") {
        this.strawberry_votes += 1;
      } else if (vote === "vanilla") {
        this.vanilla_votes += 1;
      } else if (vote === "durian") {
        this.durian_votes += 1;
      }
    }
}
Survey Choice component (Child)
import { Component, EventEmitter, Output } from '@angular/core';
import { FormsModule } from '@angular/forms';

@Component({
    selector: 'app-survey-choice',
    standalone: true,
    imports: [FormsModule],
    template: `
    <div>
    <form #myForm="ngForm" (submit)="onSubmit(myForm.value)">
        <fieldset>
        <legend>Please select your favorite ice cream flavor</legend>
        <div>
            <input type="radio" id="strawberry_choice" name="flavor_choice" value="strawberry" ngModel/>
            <label for="strawberry_choice">Strawberry</label>
            <input type="radio" id="vanilla_choice" name="flavor_choice" value="vanilla" ngModel/>
            <label for="vanilla_choice">Vanilla</label>
            <input type="radio" id="durian_choice" name="flavor_choice" value="durian" ngModel/>
            <label for="durian_choice">Durian</label>
        </div>
        <div>
            <button type="submit">Submit</button>
        </div>
        </fieldset>
    </form>
    </div>
    `
})
export class SurveyChoiceComponent {
    @Output() myOutput = new EventEmitter<string>();

    onSubmit(value:any) {
      this.myOutput.emit(value.flavor_choice);
    }
}
As we can see in the SurveyChoiceComponent, we are using an EventEmitter object called "myOutput" to "emit" the flavor_choice value that we select in the form in the template.
export class SurveyChoiceComponent {
    @Output() myOutput = new EventEmitter<string>();

    onSubmit(value:any) {
      this.myOutput.emit(value.flavor_choice);
    }
}
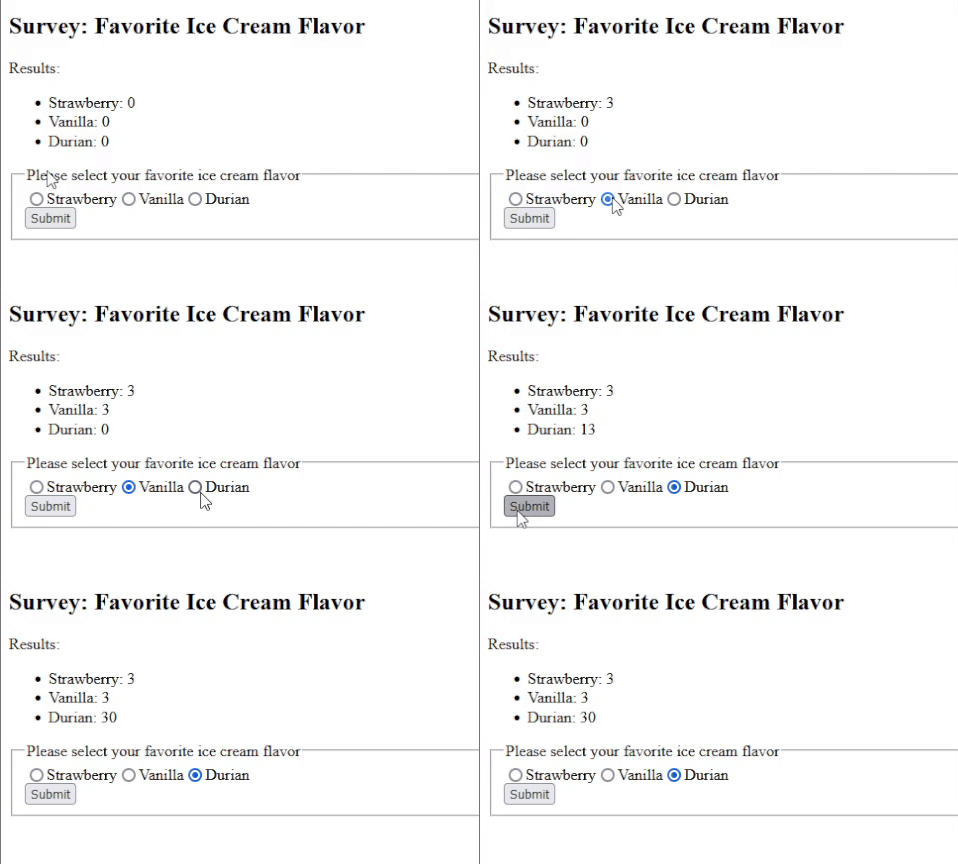
In the SurveyComponent's template, the app-survey-choice selector is used and upon that selector, we add an event binding to the "myOutput" event which calls the "vote_counter" method in the SurveyComponent and passes the "$event" object to it. The vote_counter method, then increases the vote values accordingly based on the selected choice that was passed to it in the $event object.
<app-survey-choice (myOutput)="vote_counter($event)"></app-survey-choice>
The results you can see here below:

Nom Nom Nom! 🍨
Wrapping Up
In this article we looked over how we can pass data from a Parent Component to a Child Component using the @Input decorator and some property binding on the child selector. We also sent data in the opposite direction from the Child to the Parent using the @Output decorator and the EventEmitter class. These are just two methods for component communication in Angular. There are other methods of sharing data between components such as services, signals, local variables. We may dive into those in a future article. For now, I hope this was helpful and enjoy the Durian ice cream!


